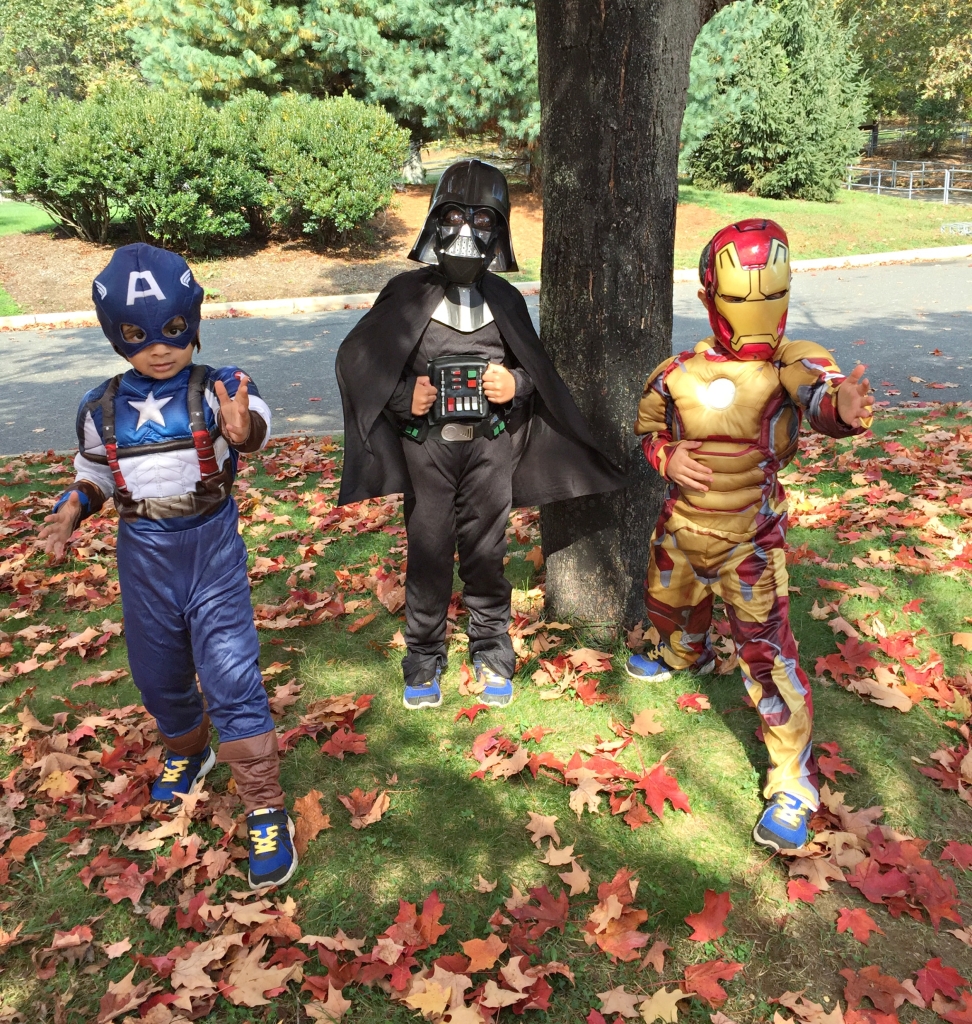
This year for Halloween we had a lot of super hero/villan action happening on Sheena’s side of the world, and a lot of colorful action on Nina’s side of the world. It is crazy to think how different both households are this time of year. We thought we would share what our kids and Sheena were up to this holiday season. Since Sheena is not really a fabric person, she store bought the costumes for the boys. However, in true Nina fashion, she made Naya and Niva’s costumes and we are sharing her “how to.” Sheena wanted to do something subtle, so she used a lot of what was in her closet. She is sharing her “how to,” sans stitching, as well. We would love to see what you and your kids dressed up as this Halloween. Tag your pictures at #runwaysandrattles and share your looks.
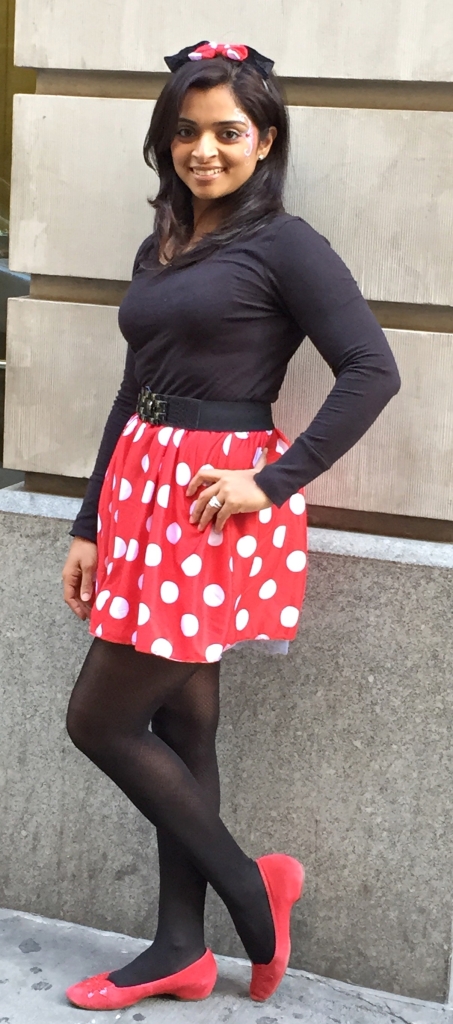
Sheena bought a toddler medium, minnie mouse costume ($20) at Target. She cut off the shirt of the costume and left the skirt with the elastic on it. She grabbed a long sleeve black shirt, a black belt, black stockings and red shoes (already had those bad boys!) from her closet and voi-la! A low cost and cute Minnie Mouse costume!
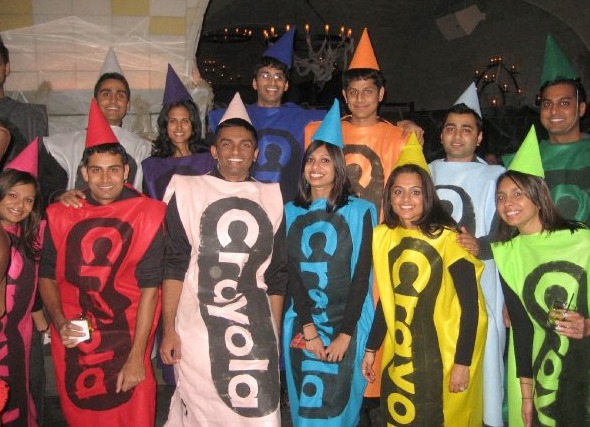
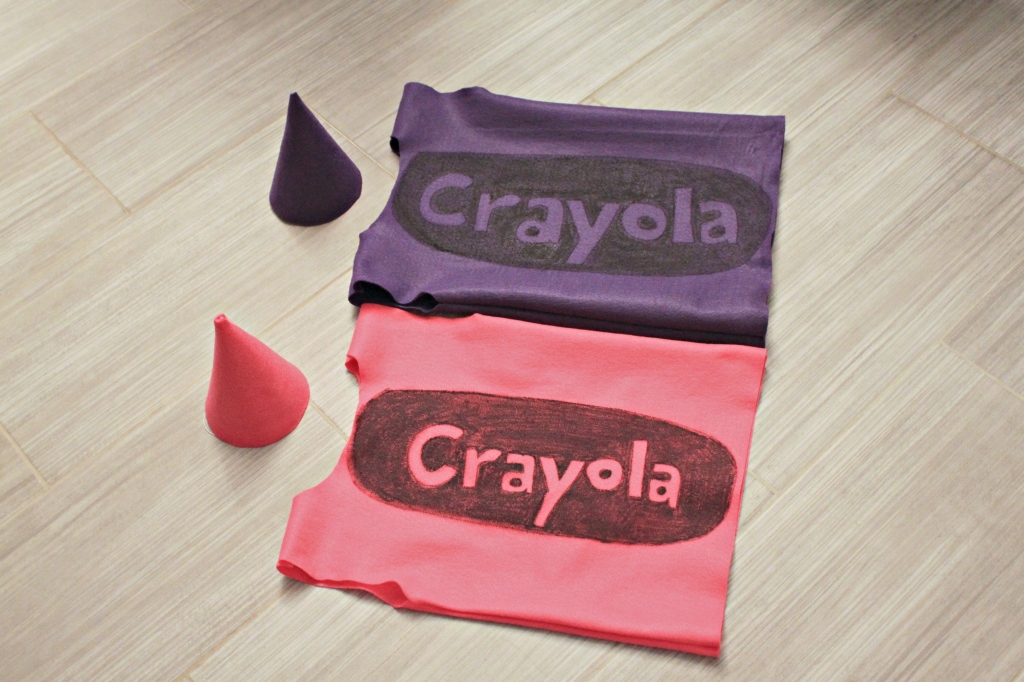
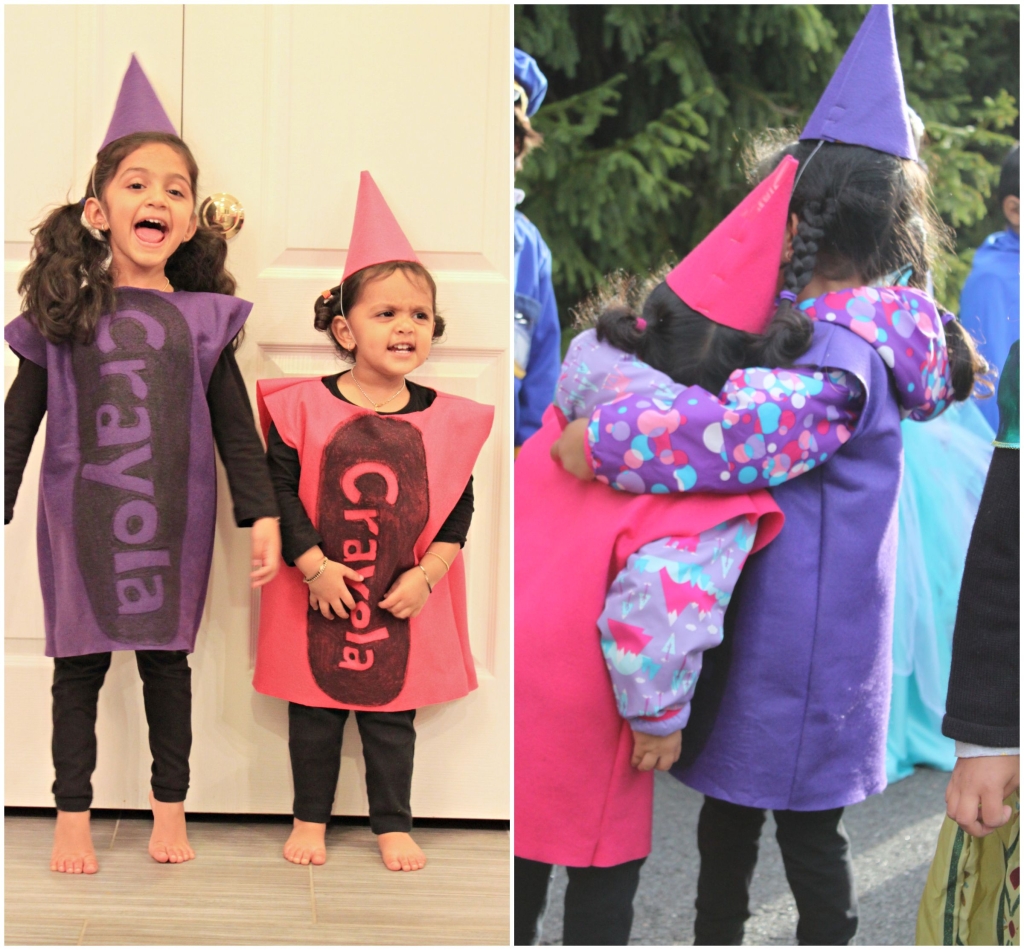 Nina made her little dumplings Crayola Crayon costumes! She had made these back in 2008 for all of her friends to wear for halloween. She figured it would be a fun “full circle” to make them 6 years later for her little girls. She even kept their jackets on underneath this morning since it was SO cold!
Here is her simple “how to” tutorial on this awesome DIY crayola crayon costume, both costumes took her less than an hour. Enjoy:
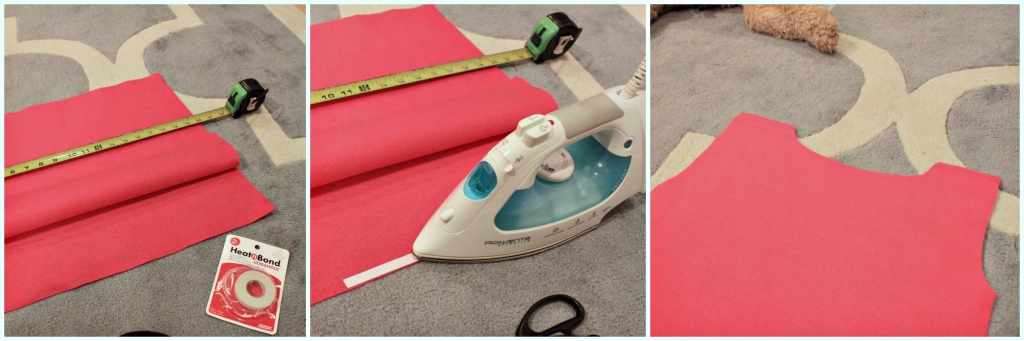 She bought 1 yard of fabric per kid. Measure length of child from shoulder to mid-calf, and shoulder to shoulder. Add 1 inch to length and 2-3 inches to width measurements (for the seam) and cut 2 rectangles by height x width. Use No Sew Hem Bond Iron on Adhesive and “sew” three sides together- just place on rectangle on top of the other. Once the adhesive cools, cut the arm holes and the head hole (see third pic in series above) – be generous as you will want this to be loose not tight like a t-shirt. Turn it inside out and TA-DA! Base is done.
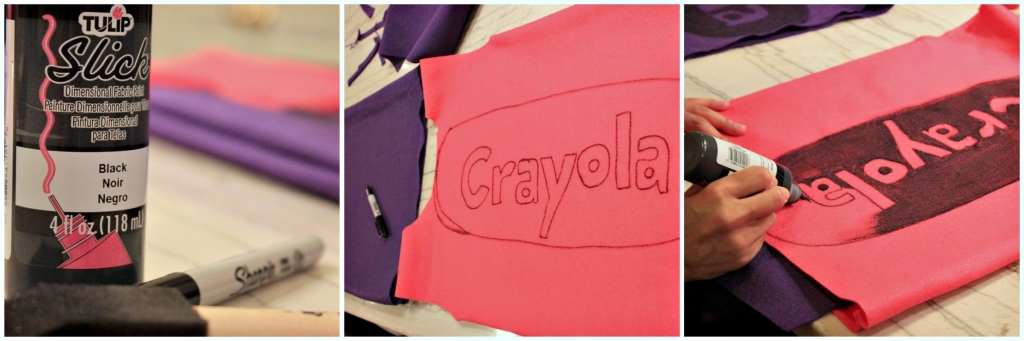 All you will need now is a Sharpie and some black fabric paint. Trace out in block letters the word “Crayola” and draw a big oval around it. Use your paint, and a sponge tip brush to spread it around, to fill in the OUTSIDE of the letters. Let it dry and DONE!
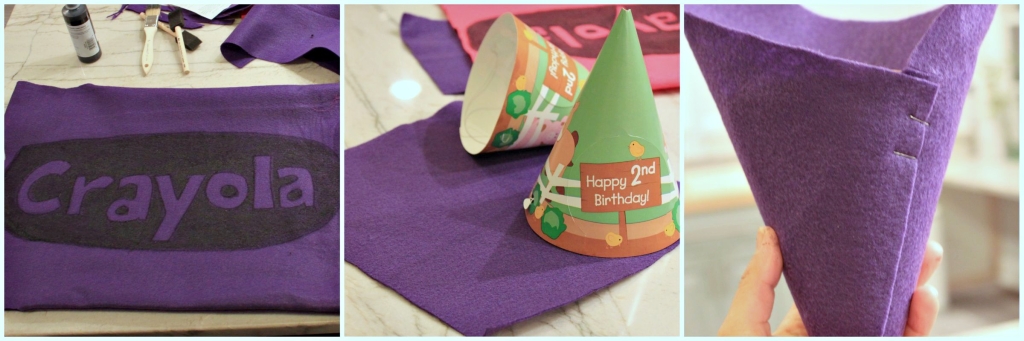 For the crayon “tip,” use a birthday cone hat, cut out a square piece of the fabric and wrap it around with one of the corners at the tip. Staple where the edges meet, and cut around the rest. She added black leggings and a black long sleeved shirt underneath to complete the look!
Here is a small treat….her 2008 version with all her very cooperative friends. (sorry guys!).